A trigger is an item that, on contact, explodes. Well, if you want it to, maybe. A trigger is something which stimulates the occurrence of something else. Now just remember, we’re just getting into triggers here. Triggers may just be the most important thing you will learn in this Wiki, so there is a lot more discuss in further sections.
Teamspawn Triggers
So now you have a team but your level doesn’t know that. Let’s place a TeamSpawn trigger.


Information Triggers
Information triggers are those which when approached, display some sort of information to the user. They can be used for conveying level objectives, incorporating previously created mini-games and providing access to external media files or even URL’s.


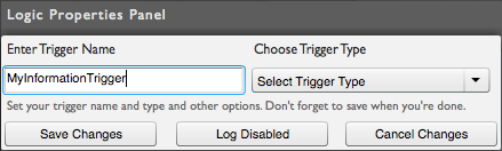
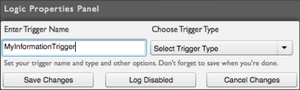
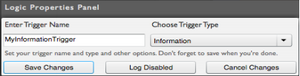
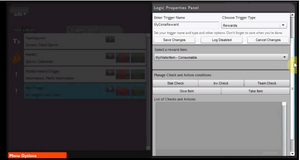
Click on the new trigger to open up a very similar logic properties panel. Give the trigger a very specific name.
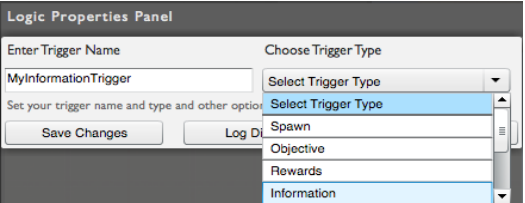
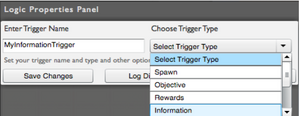
Select Information under the Choose Trigger Type drop-down.
A subtype panel should open up below. Under the "Information Trigger Type", choose "Media Information".


In the "Enter Some Information or Clue" textbox, you can write a custom message you wish to give to the user.


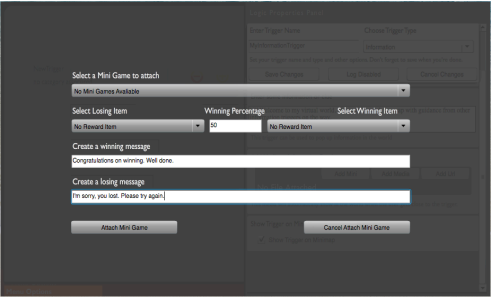
Below, the “Add Media to Information” panel allows you to add either a mini game, external media file or URL link to direct the user to a desired website when he or she approaches the information trigger. Clicking “Add Mini” should bring you to this window, with which you can incorporate a previously created mini game in your information trigger. If you wish to add reward items however, you would need to have created them already. Creating mini-games will be covered in greater detail in the next chapter, and creating rewards is coming up.

Clicking "Add Media" will allow you to browse through your computer for any images, ideos, etc that you wish to include in your virtual world.


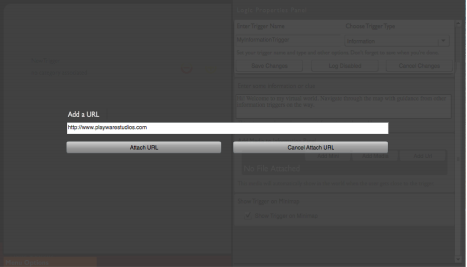
Clicking "Add URL" will bring you to this window, where you can simply copy-paste a desired URL into the textbox.

The last stage of creating your information trigger allows you to display your trigger on the mini-map during gameplay. In order to activate this, tick the checkbox.


Don't forget to save

Movement Triggers
Movement triggers are anything that allow that cause the player to move. The two types of movement triggers are Portal triggers and Throw Triggers. Portal Triggers allow the player to place two such portals which allow the player to move between each.
Throw triggers push the player back a certain distance and can be used to create innovative traps and obstacles.


Back here again

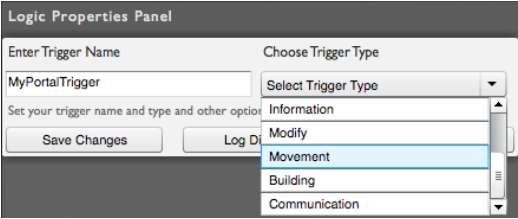
Give it another name and choose movement from the drop-down menu. Panels below it should now open up, two options will be present, portal and throw. Choose portal for now.
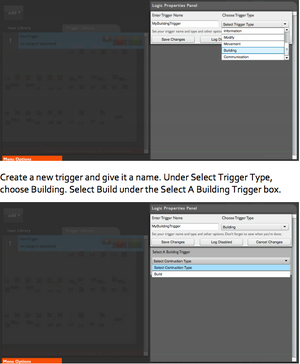
Building Triggers
Building triggers are triggers which allow you to build structures in the world. Building these structures can be used as a manner of giving rewards or as structural entities. Seed items created beforehand are required to use building triggers and serve as the fuel to feed the building process. Seed Items can be placed around the world and a certain number of them will be required to be collected in order to build the structure.

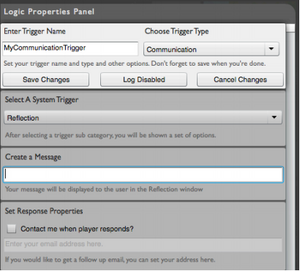
Communication Triggers
Communication triggers are a tool that would affect teachers more than students. It allows players to give feedback in-game through a text box. The feedback is sent through a personalized email address which has to be registered on the 3DHive portal that you signed up on many moons ago.

Give an empty trigger a name and select Communication under Choose Trigger Type. Select Reflection under Select A System Trigger. You can write out a question or statement telling your students what to do. Check the check box and type in the email address that is registered to your 3Dhive account.
Reward Triggers
Reward triggers can be used to give the player reward items for fulfilling objectives, or completing other in-game tasks. For example, killing enemy team non-player characters may yield boosts or failing a mini-game might give you a curse. Reward items can be inventory or consumable items.
The player can receive rewards in these scenarios:
- Killing another player character
- Killing an NPC character
- Losing or winning a mini-game
- Creating or destroying a building
A reward is undeniably a trigger, not an item, it links a previously created item in a way so that it is accessible in the game. However, the creation of a reward trigger will require you to have either an Inventory, Consumable or Seed Item in your item library.


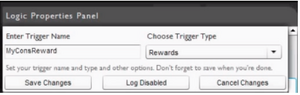
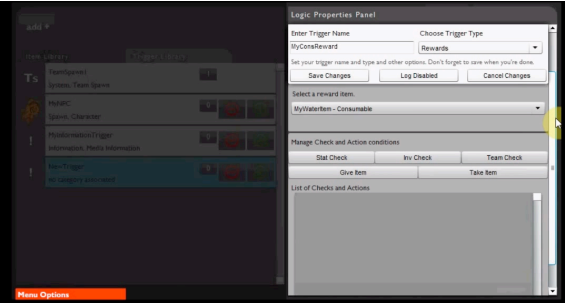
So do that now. Then create a new trigger and give it a name and choose Reward from Select Trigger Type.

Select an Item from your now created list to use as your reward. Just remember that all the properties of your item which you set when creating it will be saved and will affect the player according to them.
Click Save and your reward trigger is completed.
To add a kill reward to a player character, open up your game settings editor from when we created a Teamspawn.


You will find boxes in menus allowing you to add rewards to them in many trigger windows. The process is as simple as this, just click on the tab and choose which reward item you want to add. Kill rewards can also be added to NPCs, but you don’t know how to make them yet, so you’re just going to have to hang on for that.
Spawn Triggers
A spawn trigger can be used to automatically generate an item in your game world as soon as the game begins. Several types of items can be spawned, including consumable, inventory, helmet, weapon, costume, character and seed items. In order to create a spawn trigger, it first has to be associated with b a previously created item which it will spawn. Spawn items can be generated once, or can constantly continue to be generated after a certain time interval that you set while creating it. Check and action conditions can also be used with spawned triggers. Now all of those items you made will now be able to be used in-game.


Create a new trigger and give it a name. Select Spawn under Select Trigger Type.


Spawn Triggers can be created for:
- Consumable Items
- Inventory Items
- Helmet Items
- Weapon Items
- Costume Items
- Character Items
- Seed Items
- Trickle Items
By selecting the item type you wish to create a spawn trigger for, you restrict the Linked Items to be specifically from that category. Just a repetition, you need to have created items from whichever category you require and they must be stored in the item library.


The next sub-panel Spawn Regeneration Time enables you to decide how long it takes (in seconds) for the consumable or inventory item to respawn after it is picked up, If you don’t wish for the item to respawn, you can set it to Generated Once.


The Check and Action condition bar in this case is very important (especially if you chose character up there) allowing you to govern many things including interaction with NPCs. A new trigger will be created once you hit save. Now prepare to unleash your spawn upon the earth.
A Note on Placing Triggers

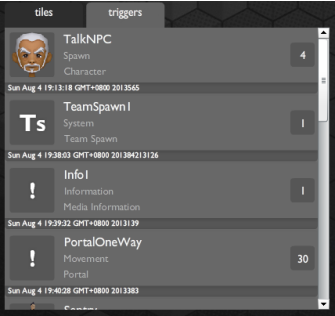
All the triggers you create will show up in your trigger library in the main menu.
To place them, it is as easy as selecting one and clicking somewhere on the level. You can click more than once if you want the same trigger twice, but you can only place one of each Teamspawn.
Portal triggers allow you to place the same trigger multiple times, so you don’t need to create a new one every time. To place a portal, click somewhere on the screen to create the entry and somewhere else to create the exit.
You might be wondering about these little buttons above the level. The one that says SP allows you to control which of your spawn triggers you want to hide when working on the level so as to prevent clutter. The button on the left controls the logic lock function which allows you to place triggers in an overlapping manner.

You might be wondering about these little buttons above the level.The one that says SP allows you to control which of your spawn triggers you want to hide when working on the level so as to prevent clutter. The button on the left controls the logic lock function which allows you to place triggers in an overlapping manner.